

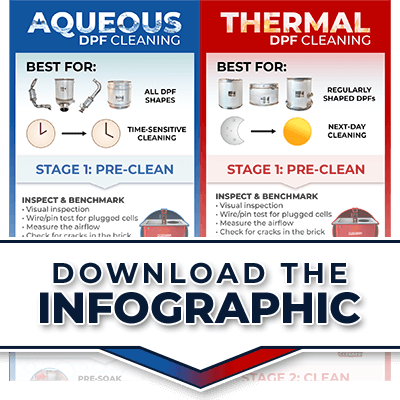
Pre Clean
Inspection Stage – BEFORE
- Visual Inspection: Look for cracks, holes, or other damage to the filter brick.
- Check for Cracks: Using the built-in light feature of the Inspection Table, check the filter for cracks or compromised cells. The high-intensity light shines up into the filter from below. When you peer into the top of the filter you should not see any of the light shining up through it. If you do see light through the filter’s brick that indicates it is cracked or melted.
- Wire/Pin Test: Perform a wire/pin test before and after cleaning. If the DPF has hardened areas after cleaning, it may need additional cleanings or replacement if the ash is too compacted.
PRO-Tip: Pin test the outlet end first, this gives a good indication of how deep the cell should be and also a feel for what a clean cell should feel like. Check a few cells then flip over and do a thorough test of the inlet end. Check in a star pattern across the face.
- Heat Damage? Check the DPF for signs of extreme heat damage such as scorching or melting. If the DPF has experienced an extreme heat event, it is likely damaged beyond repair. Melting can also become evident during a pin test when the pin won’t fully go down in an entire area of cells.
- Dirty Outlet? Check the outlet side of the DPF for soot. This indicates the DPF is compromised and should be replaced.
- Fluids Present? See if there are any engine fluids such as oil, fuel, or coolant on the filter. This indicates an upstream issue that must be fixed. If not, the aftertreatment system will not function correctly or worse sustain major damage.
PRO-Tip: Use a unique identifier for each filter & write it on the filter with a paint-marker or similar to keep things organized. This is especially important for operations with lots of trucks and filters.
Benchmarking – BEFORE
- Measure the “before cleaning” weight & airflow.
- Document the weight & airflow numbers (in FilterTrak or similar system)
- Take pictures of the filter (save in FilterTrak or similar system)

Clean THE DPF
Clean the filter using your preferred method – in most cases, this will be either the Thermal or Aqueous process.
PRO-Tip: Thermal process: Be sure the filter has sufficiently cooled down for safe handling before conducting the Inspection & Benchmarking. The Filtertherm Cool Down Cart can accelerate the cooling stage.
PRO-Tip: Aqueous process: Thoroughly dry the filter with the purpose-built Filtertherm Dry-Out machine (usually well under 2 hours).

POST Cleaning
POST Inspection Procedures:
- Visual Inspection: Again, look for cracks, holes, or other damage to the filter brick.
- Wire/Pin Test: Perform a wire/pin test after cleaning. Check using a star pattern across the inlet face. If the DPF is still dirty or has stubborn areas, it may need an additional cleaning. If that doesn’t work a replacement may be required.
- Fluids Present? If engine fluids are still present at this point, the filter may be ruined.
PRO-Tip – The Tap Test: After the DPF is cleaned, perform a “tap” test. Lightly tap the filter, inlet side down on a clean floor, there should be no more than a sprinkling of light colored ash. If you see a lot of ash, black chunks, or pencil leads, then the filter needs to be cleaned again.
POST Benchmarking:
- Determine the “post-clean” weight & airflow. Compare the numbers to the pre-clean.
The after-weight should have decreased by 50 or so grams, and the flow should show improvement. If one, but not both, has changed, there may still be an issue. If flow improves, but no change in weight there could be a small crack somewhere.
- Document the weight & flow numbers (in FilterTrak or a similar system).
- Take pictures of the filter (save in FilterTrak or a similar system).
Tools of the Trade:
We’ve cleaned thousands of DFPs, of all kinds, in our shops over the years, so we understand the importance of streamlining and systemizing the process. That’s precisely why these tools were developed. We didn’t set out to make DPF Cleaning equipment, but as they say “necessity is the mother of invention”. In other words, we began to ask ourselves: “How can we do this better, safer & faster?”
You can benefit from our years of trial and error, as we’ve pursued innovation and improved DPF cleaning.

Inspection Table
One of the answers to that question is the Filtertherm Inspection Table – a machine designed specifically for the Pre/Post stages of industrial DPF cleaning. It’s the only equipment that is included in both the Thermal and Aqueous systems. What makes it powerful is the compact footprint combined with its many functions.
- Tough & Compact: Constructed with industrial-grade powder-coated steel & a heavy-duty stainless steel tabletop. A “trim” shop footprint measuring just: 48” W x 36” D x 36” H
- Ergonomic & Portable: The tabletop is the same height as the Filtertherm Oven (& other machines) for easier loading & unloading of bulky/heavy filters. The unit has heavy-duty, lockable caster wheels for easy movement between stations.
- Multifunctional & Automated:
- The left side of the table features the scale which is auto-calibrating.
- On the right, there is the flow chamber. Included is a calibration plate for easy flow calibration.
- The right side also has a powerful built-in light that shines upward for crack detection.
Convenience features: Device shelf/USB charging port, pin storage, and a bright, touchscreen user interface.
Flexibility: With the included and add-on adapter kits you can inspect multiple size and shaped filters.

FilterTrak
FilterTrak – use this custom-built software to record and track all your DPF cleaning-related data, store before & after cleaning photos, track DPF cleanings over time, and even generate reports. Data is stored securely in this web-based app, and it works great on both desktop and mobile devices.
The alternatives are stacks of paper records that can be easily lost/misplaced. Or you can try a cumbersome spreadsheet that requires complex setup and maintenance.
PRO-tip: You get a free one-year subscription to FilterTrak with the purchase of either DPF Cleaning package.
Boots on the Ground
Experienced & Trained DPF Cleaning Techs: Last, but not least, there is always the need for the human element working with the latest in tools & technologies. From removing filters from the trucks to inspecting and making intelligent decisions all through the process, good techs are vital. A trained eye can spot problems quickly and a sharp mind can make tough decisions or find solutions. Proper procedures, training, safety, and PPE should also be prioritized.
What DPF Cleaning Techs are saying:
- Jerryd S. appreciates the uniform table height of all the Filtertherm equipment, which makes transferring/moving big, heavy filters much easier and safer. He also “highlighted” the built-in light for crack detection.


Get the Premier DPF Cleaning solution for your FLEET.
Give us a call. Get Answers.
Use our ROI tool to see how quickly this investment can save your fleet time and money. Financing is now available. Check it out!
Call or email to schedule a meeting with our expert Sales Team. Nadjara would be happy to help you.